How to share your desktop flows in Microsoft Power Automate Desktop

With the announcement by Microsoft that they are making their Robotic Process Automation (RPA) software – Power Automate Desktop – free for all Windows 10 users, many have started using this versatile low-code/no-code RPA software to automate the mundane and menial tasks at work, freeing themselves up to focus on more interesting or important stuff (or perhaps to enjoy a cup of coffee 
In fact, some have created bots that eliminate drudgery and tedium not only for themselves, but for their entire department! After all, sharing is caring!
This begs the important question – how does one share the desktop flows that he/she has created in Microsoft Power Automate Desktop?
Today, we will cover 3 ways of sharing your desktop flows. The first 2 methods will require a paid subscription, namely the “per user with attended RPA” plan. While you can’t technically share desktop flows without a paid subscription, our third method is absolutely FREE.
Let’s check out the 3 methods!
We’ve made a video that shows you all 3 methods. You can check it out below. Or if you prefer text instructions, scroll past the video, and you’ll see the step-by-step instructions.
https://youtu.be/M-VEP2eAih0
Table of contents
- Using the sharing function in the Power Automate portal
- Exporting the solution as a ZIP file and importing it
- Copying and pasting the actions
Method 1: Using the sharing function in the Power Automate portal
You can share a desktop flow with other users in your organization, giving those users specific permissions to access your flows. In this scenario, we assume the users have access to the same Power Automate environment.
Select My flows from the navigation bar on the left, then select Desktop flows. Then, select the desktop flow that you want to share, and click on the share button.

Under the Add people field, enter the name of the person in your organization you would like to share the desktop flow with. Select Give access, and choose the permission level that you want to assign to this person.
There are 2 different permission levels you can assign when sharing desktop flows:
- User: Editing, deleting or sharing the desktop flow is not possible with this access. The user can only use the desktop flow in a cloud flow.
- Co-Owner: This access level grants the user full permissions, including editing, sharing and deleting the desktop flow.
Click the Share button once you are done.

If you wish to review details of a desktop flow, including the persons whom you have shared the flow with, click on More commands, then selecting the Details option.

The section Shared with displays the list of users whom the desktop flow has been shared with. To make changes, click on Manage access.

Under Manage access, you have the ability to add people, modify the current permissions granted, or to remove their access to the desktop flow.

Now the user who has been granted access should be able to see the shared desktop flow under My flows >> Desktop flows.

Note that it is possible for the user to create a copy of that desktop flow by clicking on More commands, then selecting the Save as option.

Next, rename the desktop flow (if you wish to), and click on the Save button. This will save a copy to your Desktop flows page.

And if you login to Power Automate Desktop, you can find the saved desktop flow in the Console where you can make further edits to the flow.

Method 2: Exporting a solution
Alternatively, it is also possible for you to export a solution as a zip file. Then, another user can import this zip file into their own Power Automate environment.
But first, you need to create a solution. A solution is essentially a mechanism for managing the application lifecycle. When you host your desktop flows in a solution, they become portable, i.e. you can migrate them from one environment to another easily.
Do note that in order to create solutions, you need Dataverse (which comes with a paid plan) and an environment with version 9.1.0.267 or later.
To create a solution, click on Solutions on the navigation bar on the left. Next click on New solution, and provide all the required information including Display Name, Name, Publisher and Version. Click on the Create button when you are done.

Next, select the solution that you have just created by clicking on it. Click on Add existing, and then select Desktop flow.

Select the desktop flow that you want to add into the solution, and click on the Add button. Note that it is also possible to create a desktop flow directly in a solution, in which case they are known as solution-aware flows. Also, you can add multiple flows in a single solution, including non-desktop flows.

Now, select Export. The Before you export pane will appear on the right. Click on the Run button under Check for issues. This will run the solution checker to detect for performance or stability issues, so make sure that no issues are reported. Then, click on the Run button under Publish all changes. You will need to publish all components that needs to be exported later on. Once these 2 steps are completed successfully, click on the Next button.

The Export this solution pane appears on the right. Update the Version number if required, and select the Unmanaged option under Export as. Click the Export button when you are done.
Note: a solution can be either managed or unmanaged. As a simple rule of thumb, developers work in development environments using unmanaged solutions, then import them to other downstream environments—such as test—as managed solutions.

This export can take several minutes to complete. Once finished, the solution will be exported as a zip file which you can find in the default download folder specified by your web browser.

After you’ve sent or shared the zip file with your friend of colleague, they can import the solution to use it. To import a solution, select Import. The Import a solution pane will appear on the right. Select the zip file which you have exported in the previous step, the click the Next button.

Next, click on the Import button to begin the import. Note that this import can take several minutes to complete. Also, you are not able to import a solution that already exists in that environment.

When the import is completed successfully, the imported solution will be displayed under Solutions.

Now, if you navigate to My flows >> Desktop flows, you will be able to find the desktop flow there.

Method 3: Sharing desktop flows by copying and pasting the actions
This third method that I’m going to share with you does not require any paid subscription plans at all — it is a really simple and neat solution. Let’s get started.
What you see here is this flow I have created, called “RPA challenge”. You can see that there are actually a number of different actions, and if you look at the UI elements pane on the right, there are actually some UI elements created as well. Likewise, in the variables pane there are also some variables created.

What I’m going to do here to start sharing is this: I’m going to go to my workspace, select all of the actions by using the hotkey Ctrl+A and Ctrl+C to copy them.

Next, I will open a text editor, like Notepad, and I will paste the actions which I’ve copied into my Notepad. You can send these actions that have been copied to Notepad to the friends or colleagues you want to share the desktop flow with.

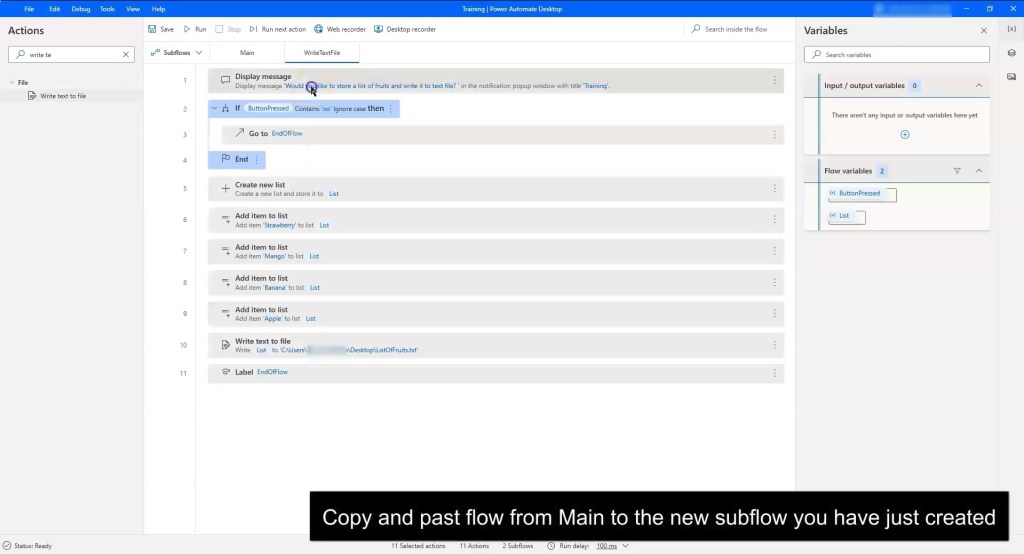
When they receive your Notepad file, they can go to their Microsoft Power Automate Desktop, create a new flow, then go to their main workspace and paste all the actions you have copied into Notepad. To paste, go to Edit >> Paste, or use the hotkey Ctrl+V.

Voila! You’ll notice something really special: not only does it copy all the actions, but if you go to the variables pane, you’ll see that it has all the variables and UI elements, including the screenshots of the UI elements.


That’s it! We have successfully copied one desktop flow to another. If I were to run this flow, it should work just like my original desktop flow.
Conclusion
Congratulations! In this article, you have learnt how to share a desktop flow between users in the same environment by using the Share feature, as well as through exporting and importing a solution for users across different environments. We also shared a method of sharing flows without any paid subscription.
Feel free to share this article if you think it might benefit someone else.
Happy automating and start sharing!
Learning Resources
https://docs.microsoft.com/en-us/power-automate/desktop-flows/manage#share-desktop-flows
https://docs.microsoft.com/en-us/power-automate/export-flow-solution
https://docs.microsoft.com/en-us/power-automate/import-flow-solution
How to share your desktop flows in Microsoft Power Automate Desktop Read More »


